Rough scan
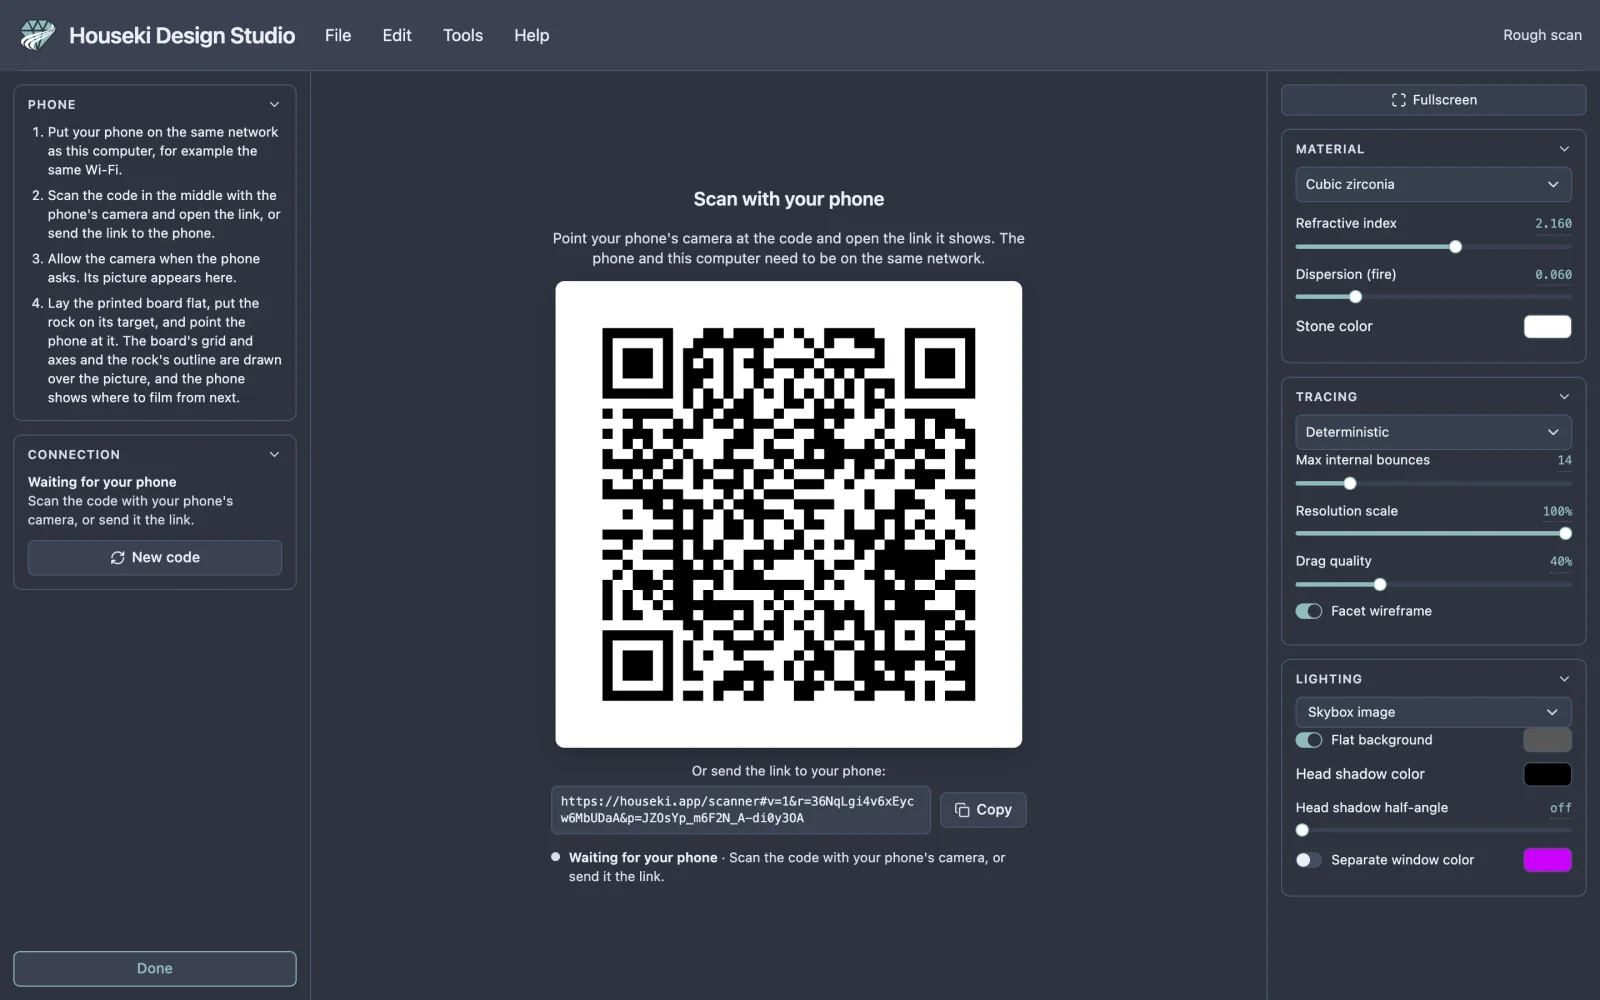
Rough scan connects your phone's camera to the studio. The studio shows a code. You scan it with your phone, and the phone's camera then appears live in the middle of the studio, where the stone usually is. Point the phone at a printed scanning board with the rock on it, and the phone finds the board, works out where the camera is above it, and outlines the rock. It draws these over its own picture and sends them to the studio, which draws them over the phone's picture too. This is the first step towards scanning a piece of rough with your phone: for now it shows what the phone sees, and does not yet build a model of the rock.
Before you start
The phone and this computer need to be on the same network, for example the same Wi-Fi. The picture goes straight from the phone to the computer over that network. Both also need an internet connection while they connect.
The printed board
To find the rock and where the camera is, the phone needs the Houseki scanning board: a sheet of black squares, 23 across and 17 down, with a small black-and-white square code in every white square, and a target in the middle where the rock goes. Each square must be 10 mm wide: print the sheet at its actual size, not "fit to page", and check one square with a ruler. Lay it flat, in even light, and put the rock in the middle of the target.
The board comes in four versions, which differ only in the middle: a sheet with no target and colour strips down both sides (the one the phone expects at first), a large blank target with two thin grey rings and small dots, the same large target without the dots, and a small target of one blank square. The large target, with or without dots, gives the cleanest outline: its blank paper surrounds the rock. The phone recognises which version it sees after a few seconds over the board, and you can also choose it on the phone (see below).
The printable board is not offered for download on this site yet.
Opening it
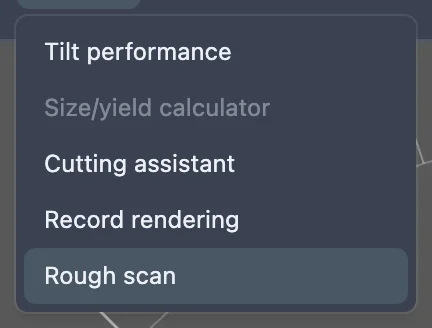
Choose Tools > Rough scan. It works whatever is loaded. It is greyed out while another mode, such as editing a tier, is open, and its tooltip then says which one to finish first. While it is open, the top bar's mode readout says Rough scan.
Connecting your phone
- Point your phone's camera at the code in the middle and open the link it shows.
- The phone opens the scanner page. Allow it to use the camera when it asks.
- The phone's camera appears in the middle of the studio, and on the phone's own screen.
Under the code is the same link as text. Click Copy to copy it (the button says Copied for a moment), then send it to your phone, for example in a message to yourself, and open it there. You can also select the text and copy it yourself: one click selects all of it. If your browser will not copy it for you, the studio selects the link and tells you which keys copy it.

The link works like a key to this session: anyone who opens it can connect their camera, so send it only to your own phone.
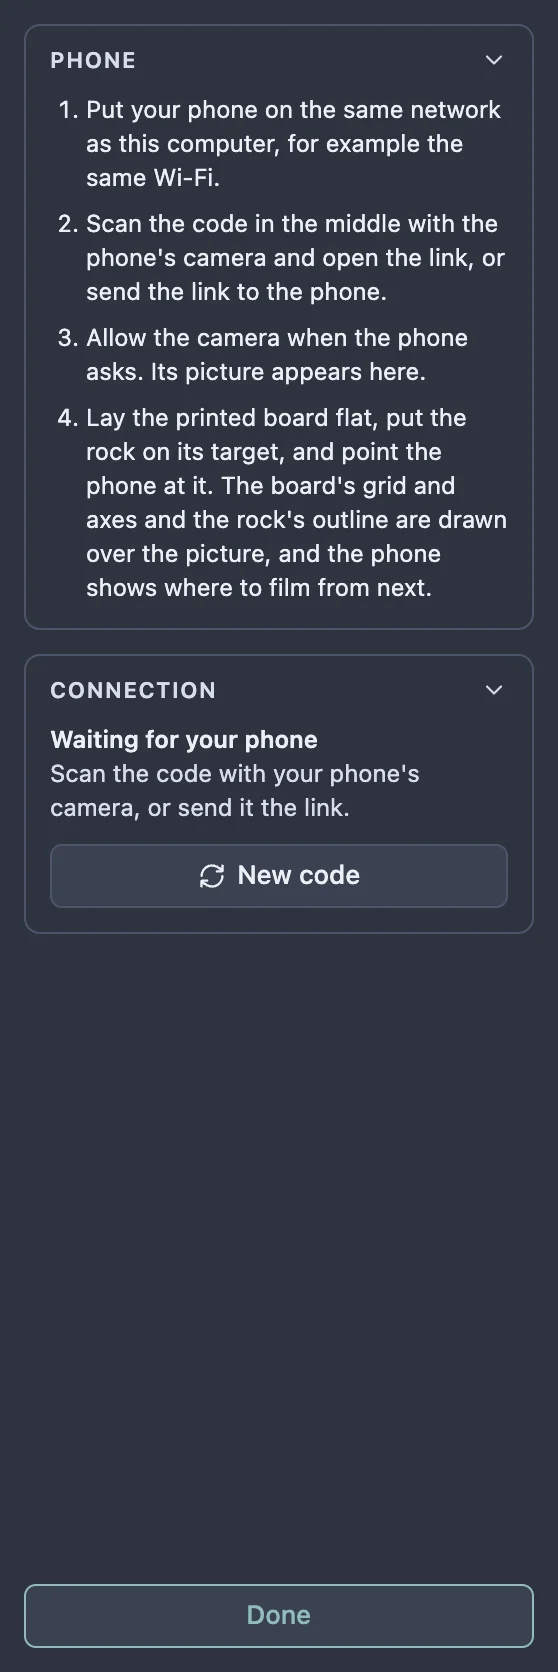
The Connection card on the left, and the line under the code, say how far it has got: Waiting for your phone until a phone opens the link, Connecting… while the phone's camera starts, and Streaming once its picture is showing.
On the phone
The phone shows its camera full screen. Once it has connected to the studio, it gets its board finder ready, which takes a moment (the line above the connection says Getting the board finder ready... meanwhile). Then point it at the board with the rock on its target. Over the picture it draws what it finds:
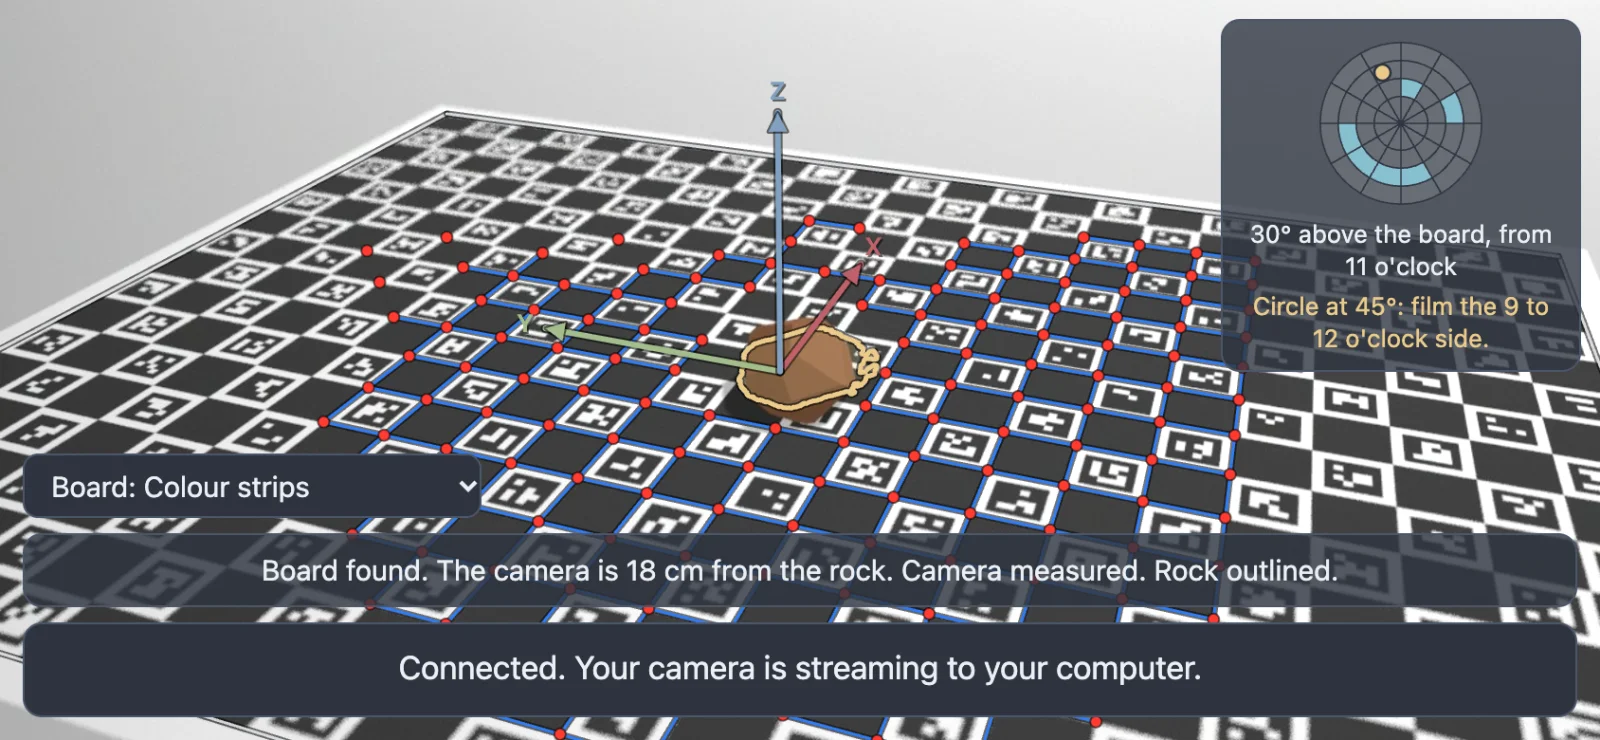
- a red point on each corner of the printed squares that it has found, and a blue line between each two found corners that are next to each other, with a white line around the edge of the board. Corners it has not found have no point, so a gap in the points near the rock shows where it cannot see the board, for example under the rock or in glare. Most of the time it looks only at the part of the board around the rock, so points further out come and go, and that is normal;
- three arrows standing on the middle of the board: red X pointing down the sheet (as it reads, top to bottom), green Y pointing to the sheet's right, and blue Z pointing straight up;
- a yellow outline around the rock, shaded inside.
If the red points sit on the corners of the printed squares and the yellow outline hugs the rock, the phone has the board and the rock right. The drawing follows the board while you move the phone: between its full searches for the board, the phone follows the squares from one picture to the next, and it draws each picture where the board is in that picture. If you stop suddenly, the drawing may overshoot for a moment and then settle back. If the points slide off the corners and stay off, the phone has lost track of where it is: hold it steady for a moment.
Where to film from
To be scanned well, a rock needs to be filmed from all round and from several heights. The box at the top right of the phone's screen keeps track of this while you film.
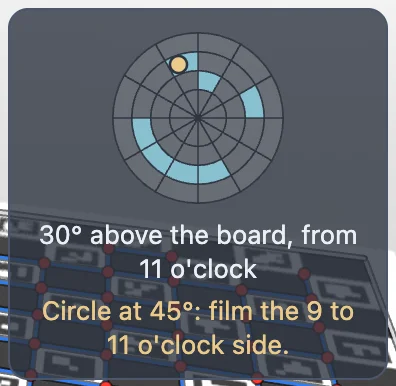
- The map is the sheet seen from above, with the top edge of the printed sheet at the top. Its rings are heights: the outer ring is the phone held low, under 20° above the board; the next two rings are 20-40° and 40-60°; the middle is looking down from above 60°. Each ring is cut into twelve sides, one per hour of a clock. A cell fills in once the phone has had a sharp, steady view of the rock from there, with the whole rock in the picture. The yellow dot is where the camera is now.
- The angle under the map says how high the camera is above the board and which side of the rock it is on, as a clock seen from above with the top edge of the printed sheet at 12 o'clock: for example 30° above the board, from 11 o'clock. It is measured from the rock itself: after a few views from different sides the phone works out where on the board the rock stands, and until then it measures from the middle of the target.
- The tip under the angle says what to film next. It asks you to finish the circle you are on (Circle at 45°: film the 10 to 11 o'clock side., or keep going all the way round while most of it is still to film), then to add a low circle with the phone about 15° above the board, then a circle at about 45°, and last a view from straight above the rock. When everything is filmed it says Every side and height is filmed.
Move slowly: about half a minute for a full circle is right. The map starts empty each time the scanner page opens, including when you reload it.
Warnings
When something is wrong with the picture, the phone says so in large letters just above the middle of the screen, where you are looking. It shows one warning at a time, the most important first. A warning appears once the problem has lasted about a third of a second, and goes half a second after it is fixed, so it does not flicker.
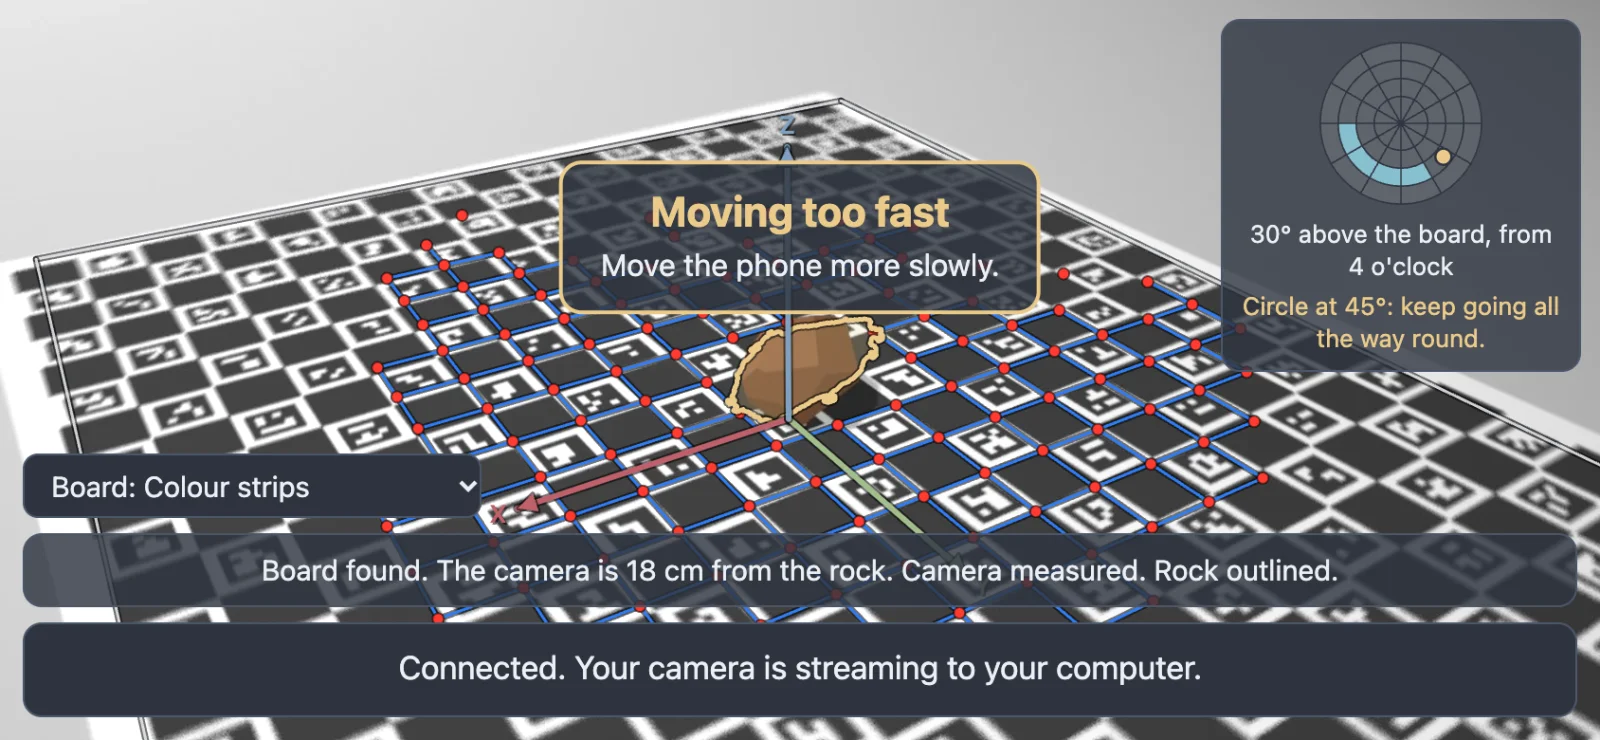
- Moving too fast: Move the phone more slowly. The board is sliding across the picture so fast that the picture blurs (faster than about 2.5 cm a second at the board). Slow down; the warning stays for a moment if the phone loses the board while you move.
- Rock at the edge: Keep the rock in the middle of the screen. Part of the rock, or the space around it, is at or past the edge of the picture.
- Rock not in focus: Hold the phone still for a moment so it can focus, or move it a little further back. The rock is blurred, for example because the camera has focused on the board behind it. The phone's camera focuses by itself once it is held steady. If it still cannot, the phone is probably too close: most phones' main camera cannot focus nearer than about 8-10 cm.
- Glare on the rock: Soften the light, or tilt the phone so the bright spots go. Bright white reflections cover part of the rock and hide its outline. Use soft, even light, such as a window on a cloudy day, rather than a bare lamp overhead.
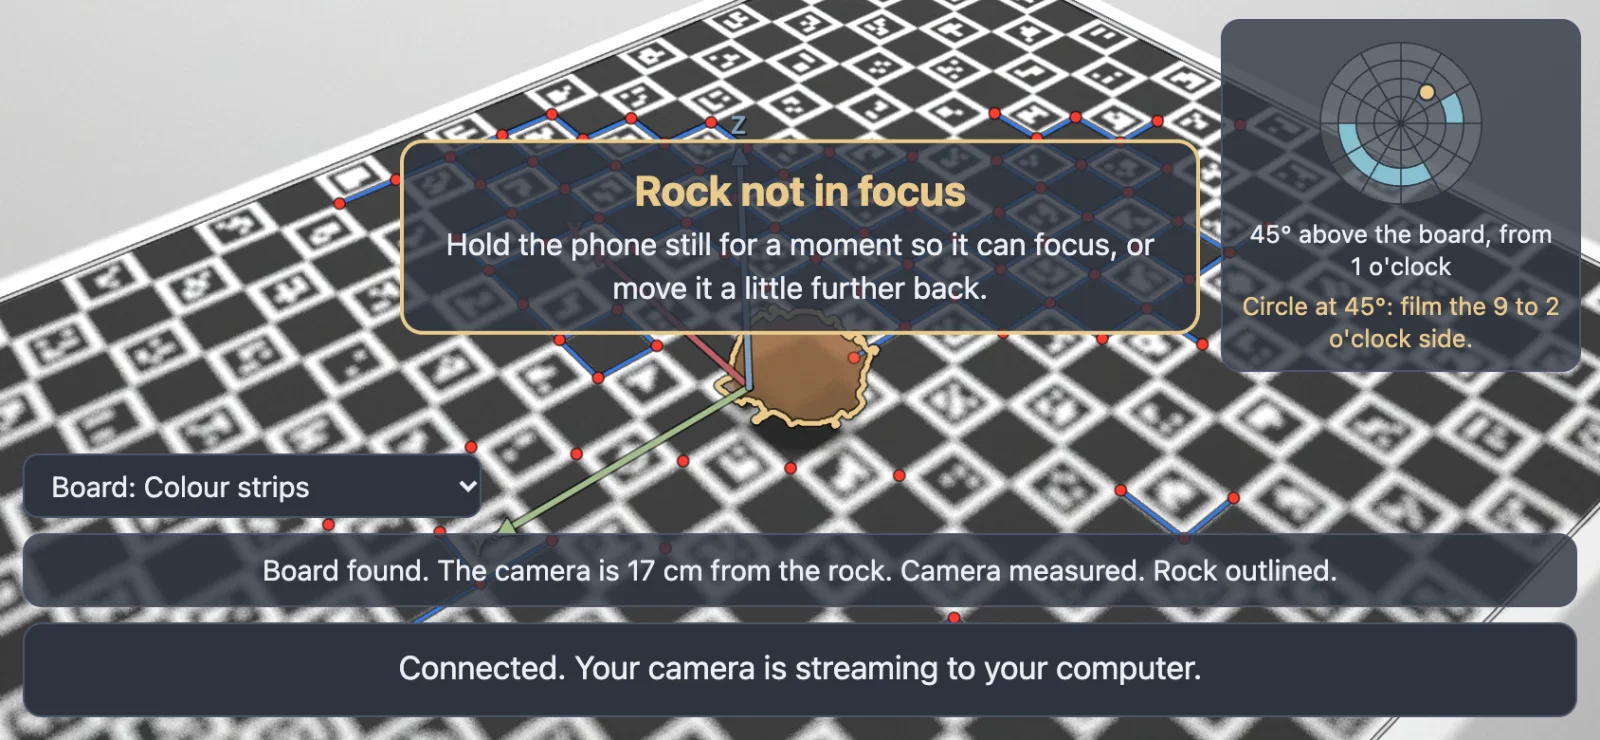
Views taken while a warning shows do not fill the map.
The line above the connection's says, in a few words, what the phone sees:
- Point the camera at the printed board. No board in view.
- Part of the board is in view. Move back a little so more of it shows. Some of its codes are visible, but not enough to work out where the camera is.
- Board seen, but not clearly. Hold the phone steady. Usually a blurred picture.
- Board found. The camera is 18 cm from the rock. How far the camera is from the rock (its height and side are under the map, see above).
- Measuring the camera... The phone works out its own camera's lens from the board as you use it. Show it the board from a slant to start; then move around the board slowly, from different sides and heights, until it says Camera measured. Distances are a little less exact until then.
- Rock outlined. or No rock found on the target.
At the top of that line is the board chooser. Board: find it for me lets the phone recognise the version of the board, and once it has, says which one it found, for example Board: Large target with rings (found). If it gets it wrong (the rock's outline then takes in parts of the printed pattern), choose your version from the list: Large target with dots, Large target with rings, Small target or Colour strips. The phone remembers the choice for next time.
How fast your phone is
Press and hold the lines at the bottom of the screen for about half a second, and a line of numbers about how fast the phone works appears between them. Press and hold again to hide it. The phone remembers whether it is shown. The same numbers, in words, are in the studio's Speed row (see below), so you can read them on the computer instead.
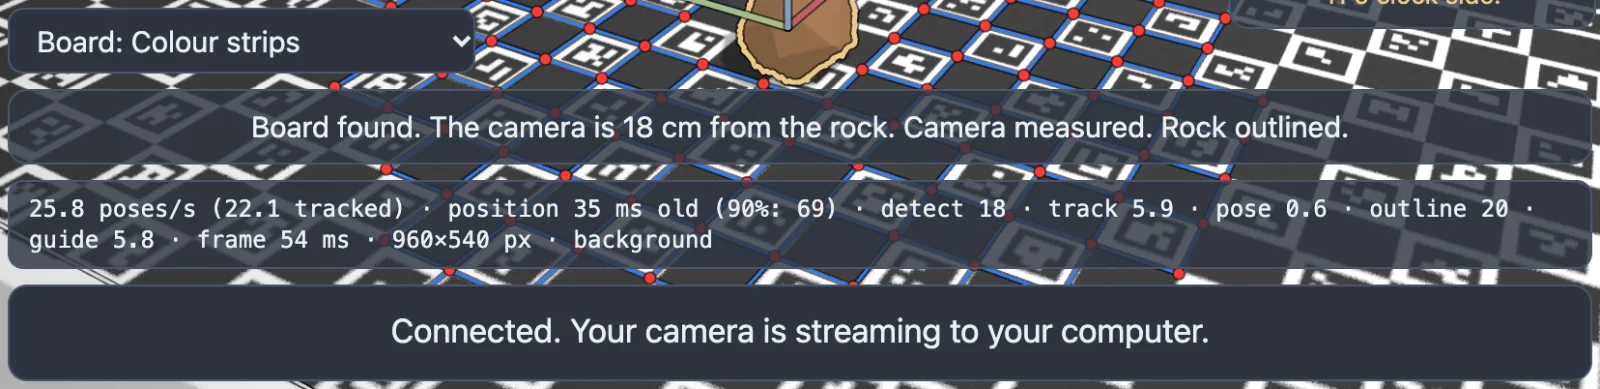
- poses/s: how many times a second the phone works out where the camera is. In brackets, how many of those came from following the board from one picture to the next, between its full searches for the board.
- position … ms old: how old, when a picture is shown, the camera position that the drawing over it starts from (half the time it is less than the first number, nine times out of ten less than the second). The phone carries the drawing forward to the picture shown, so the drawing itself does not trail by this much, but the less this is, the better the drawing keeps up with quick moves.
- detect, track, pose, outline, guide: how many milliseconds each step takes: a full search for the board, following it to the next picture, working out the camera's position, outlining the rock, and the advice and warnings. frame: a whole picture with a full search, from start to finish.
- Last, the size the pictures are looked at in, and whether the phone does this work in the background (the usual case) or in the page (older browsers, where it is kept to a share of the phone's time, so it is slower).
In the studio
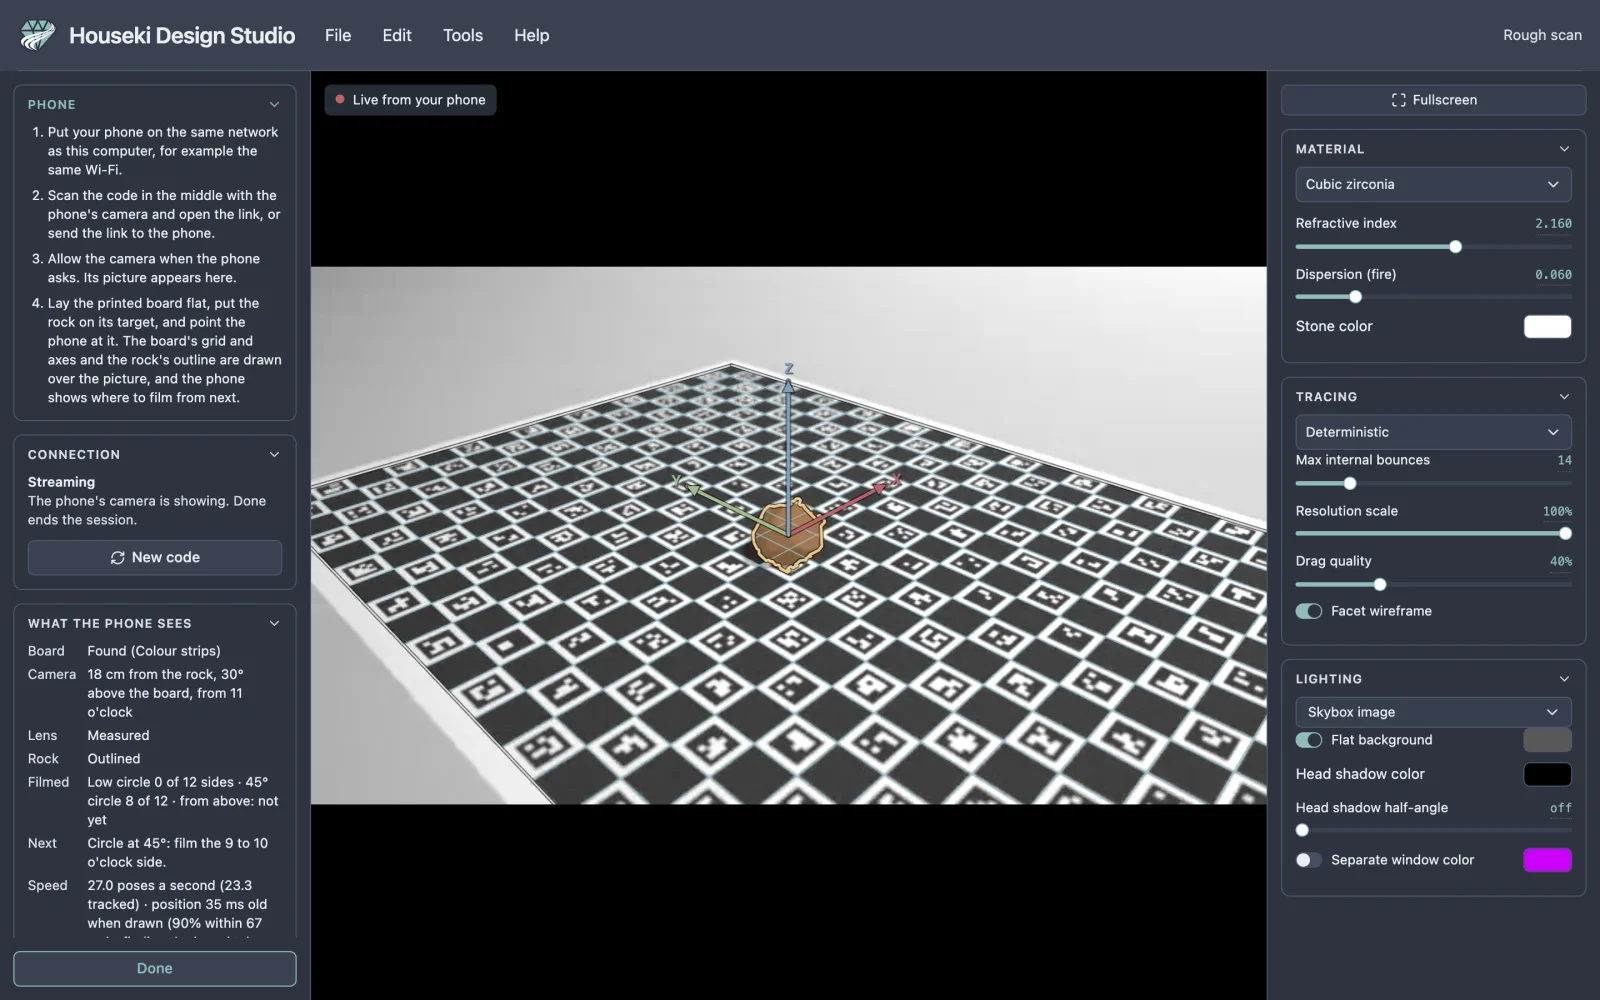
The picture fills the middle of the studio, with Live from your phone at its top left, and follows the phone as you move it. The board's grid, the arrows on the middle of the board and the rock's outline are drawn over it, as on the phone. They come from the phone up to ten times a second, so they can trail the picture for a moment when the phone moves quickly. If the phone stops sending them (it lost the board, or the page on it was closed), they fade within half a second and go after three.
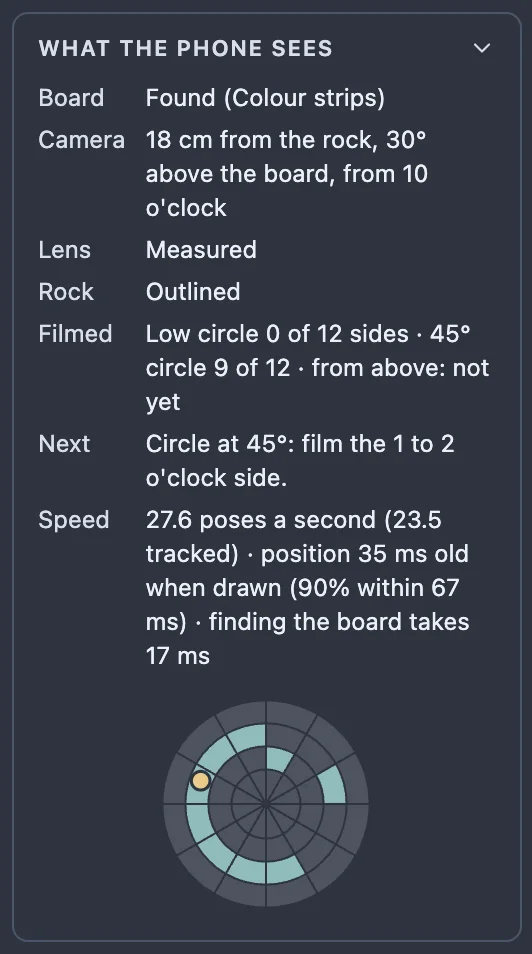
The What the phone sees card on the left reads the same out in words:
- Board: Found, with the version of the board once the phone has recognised it, or Not in view;
- Camera: how far the camera is from the rock, how high above the board and from which side, as on the phone;
- Lens: Estimating, then First estimate, still measuring, then Measured (see "Measuring the camera" above);
- Rock: Outlined or None found on the target;
- Filmed: how many of the twelve sides of the low circle and of the 45° circle are filmed, and whether there is a view from above;
- Next: the same tip the phone shows;
- Warning: the warning the phone shows, while it shows one;
- Speed: how fast the phone works, over its last few seconds: how many times a second it works out where the camera is (and how many of those by following the board between full searches), how old the camera position its drawing starts from is when a picture is shown, and how long a full search for the board takes. The same numbers as on the phone (see "How fast your phone is" above): if the drawing on the phone trails its picture, this is the row to look at.
Under them is the same map as on the phone's screen.
If the phone has sent nothing for a few seconds, the card says so. A phone whose page is from before these measurements existed still streams its picture; the studio then simply shows the picture, with no drawing and no card.
If the phone disconnects
If the phone closes the page or loses the network, the picture goes away, the studio says Phone disconnected, and the code comes back. Scan it, or open the link on the phone again, to reconnect.
New code in the Connection card ends the session and starts a new one with a new code and link. A phone that is connected is cut off, and the old link stops working. Use it if you sent the link somewhere you should not have.
If the studio cannot reach the internet to connect the phone, the code is replaced by a message saying so. Check this computer's internet connection; the code comes back as soon as the connection works.
Closing it
Click Done at the bottom of the left-hand pane, or press Esc. The session ends, so the link the phone opened stops working, and the cutting instructions and the stone come back. The next time you open Rough scan it makes a new code and link. Nothing in the design changes, so Undo and Redo do nothing while the mode is open, and the design cannot be edited until it is closed. If you switch to fullscreen while it is open, the left-hand pane is hidden, and the first Esc then leaves fullscreen.