Cutting assistant
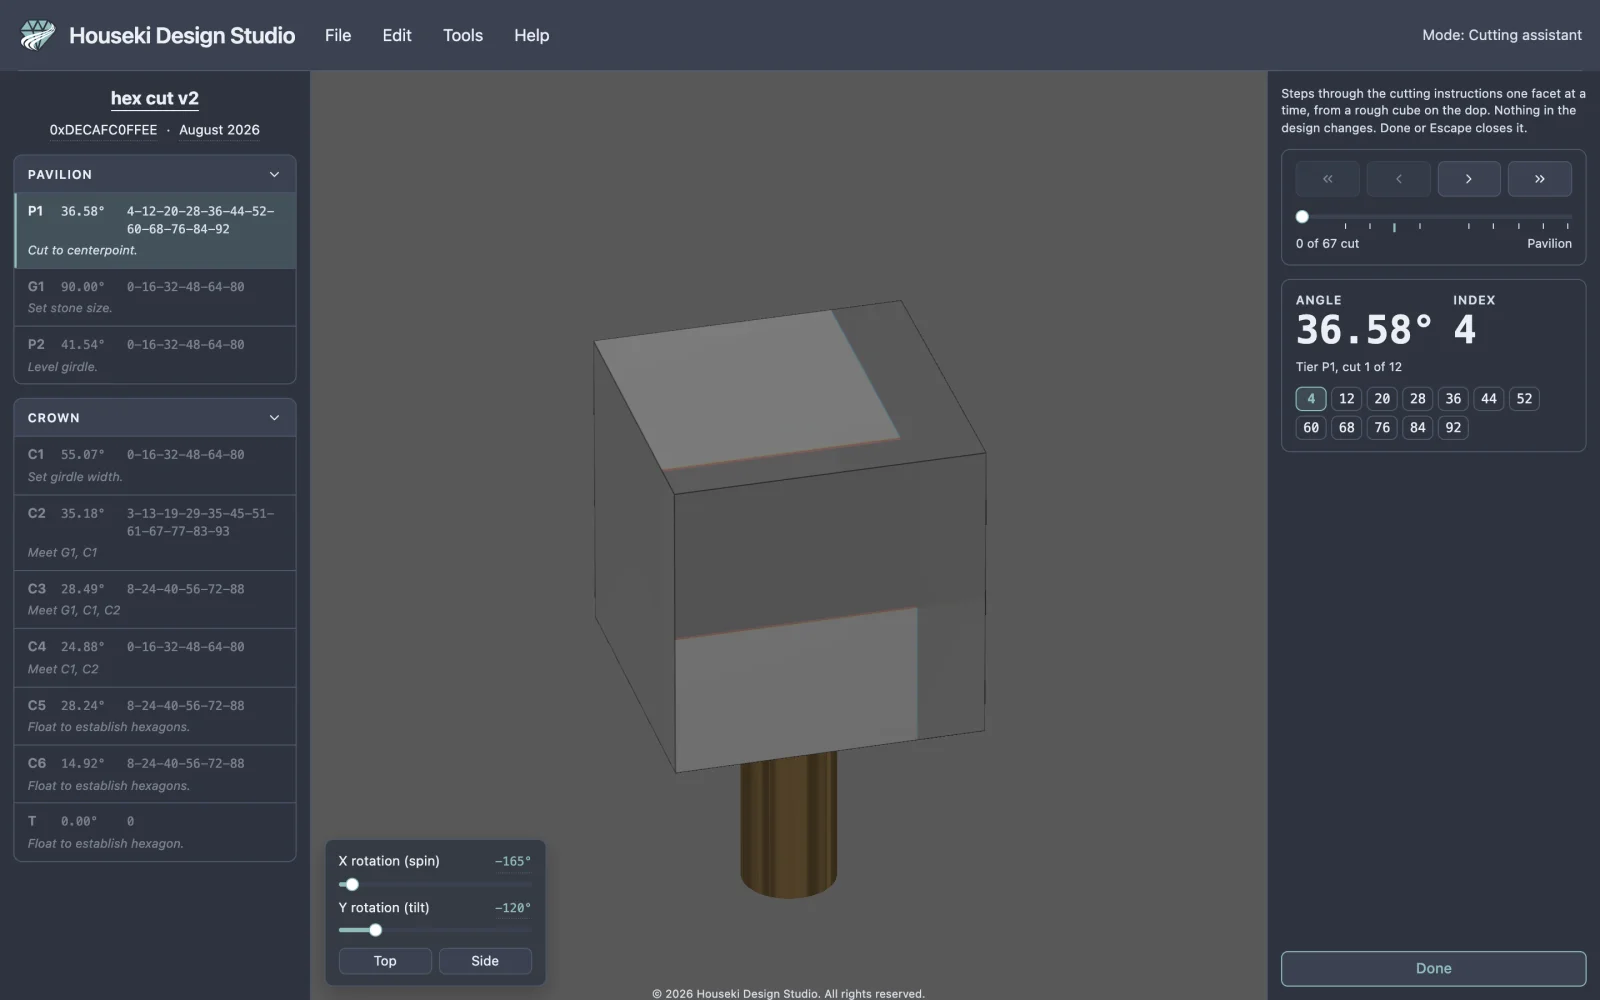
The cutting assistant walks you through a design tier by tier, the way you'd cut it at the machine: starting from a rough on the dop and adding one facet at a time, in the same order the cutting instructions list them. It never changes your design — it only shows what the stone looks like at each step, so you can check the sequence, the angles and the index settings before you touch the lap.
Opening it
Choose Tools > Cutting assistant from the menu bar.
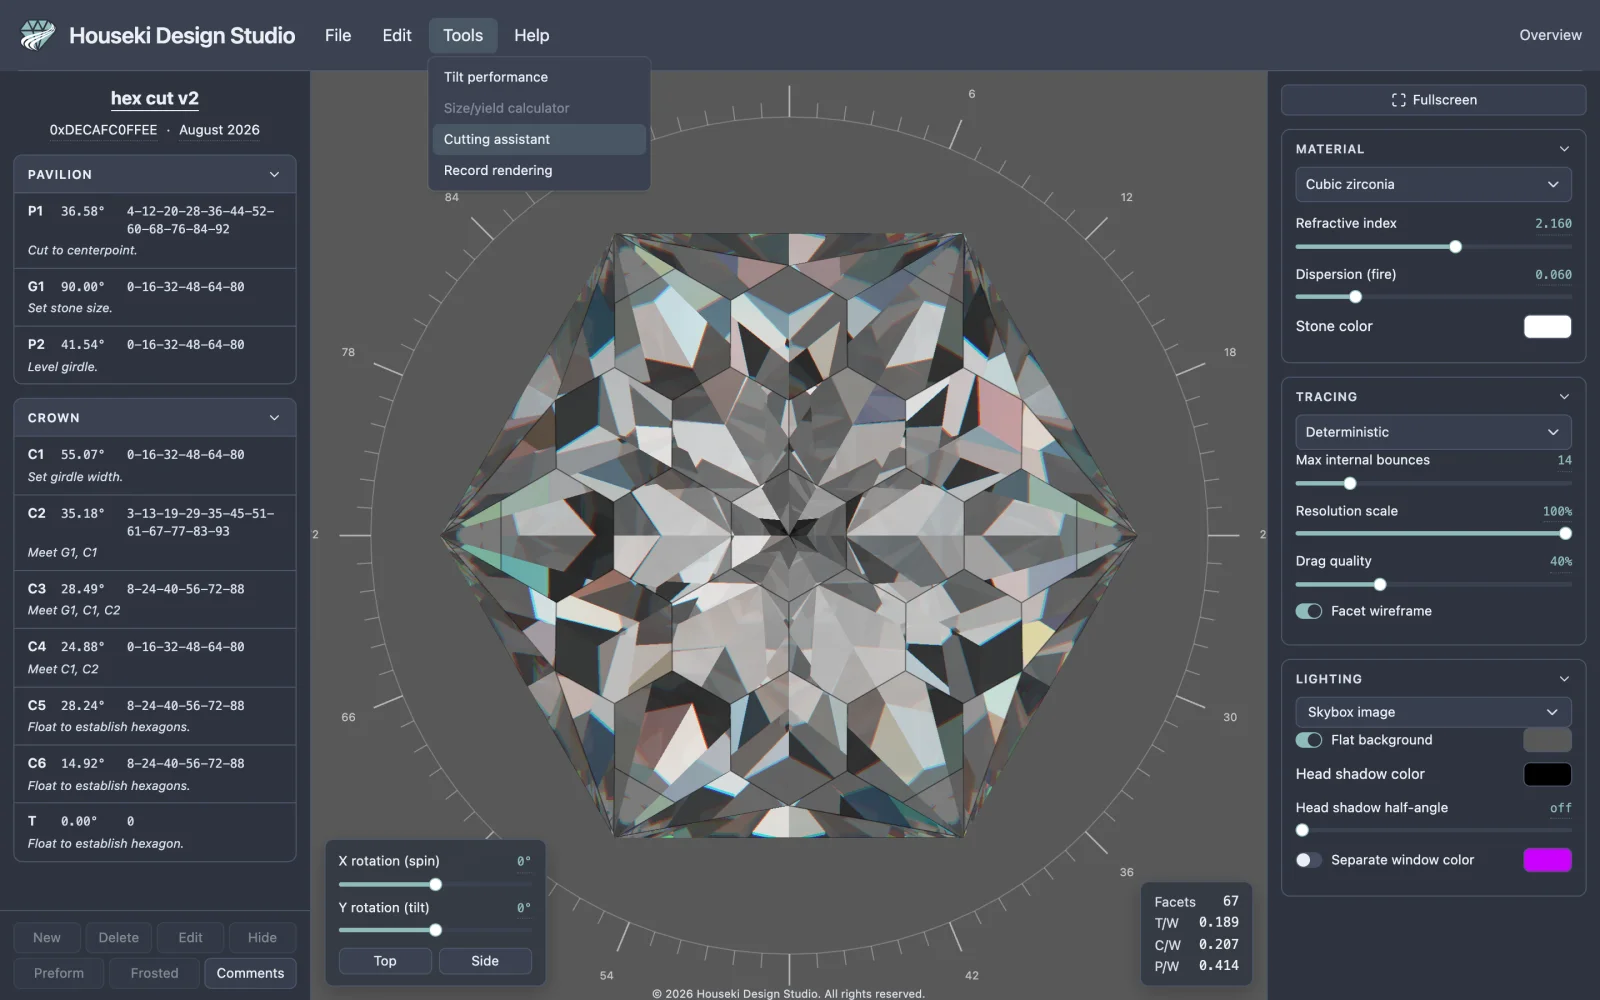
The menu item is greyed out (with a tooltip explaining why) while another mode — editing a tier, scaling height, or resizing the girdle — is already open. Finish or leave that mode first (its own Done, Cancel, or Escape), then open the cutting assistant.
The cutting assistant is a window onto your design, not an edit: nothing you do inside it is saved, and there is no Cancel button because there is nothing to undo.
What the screen shows
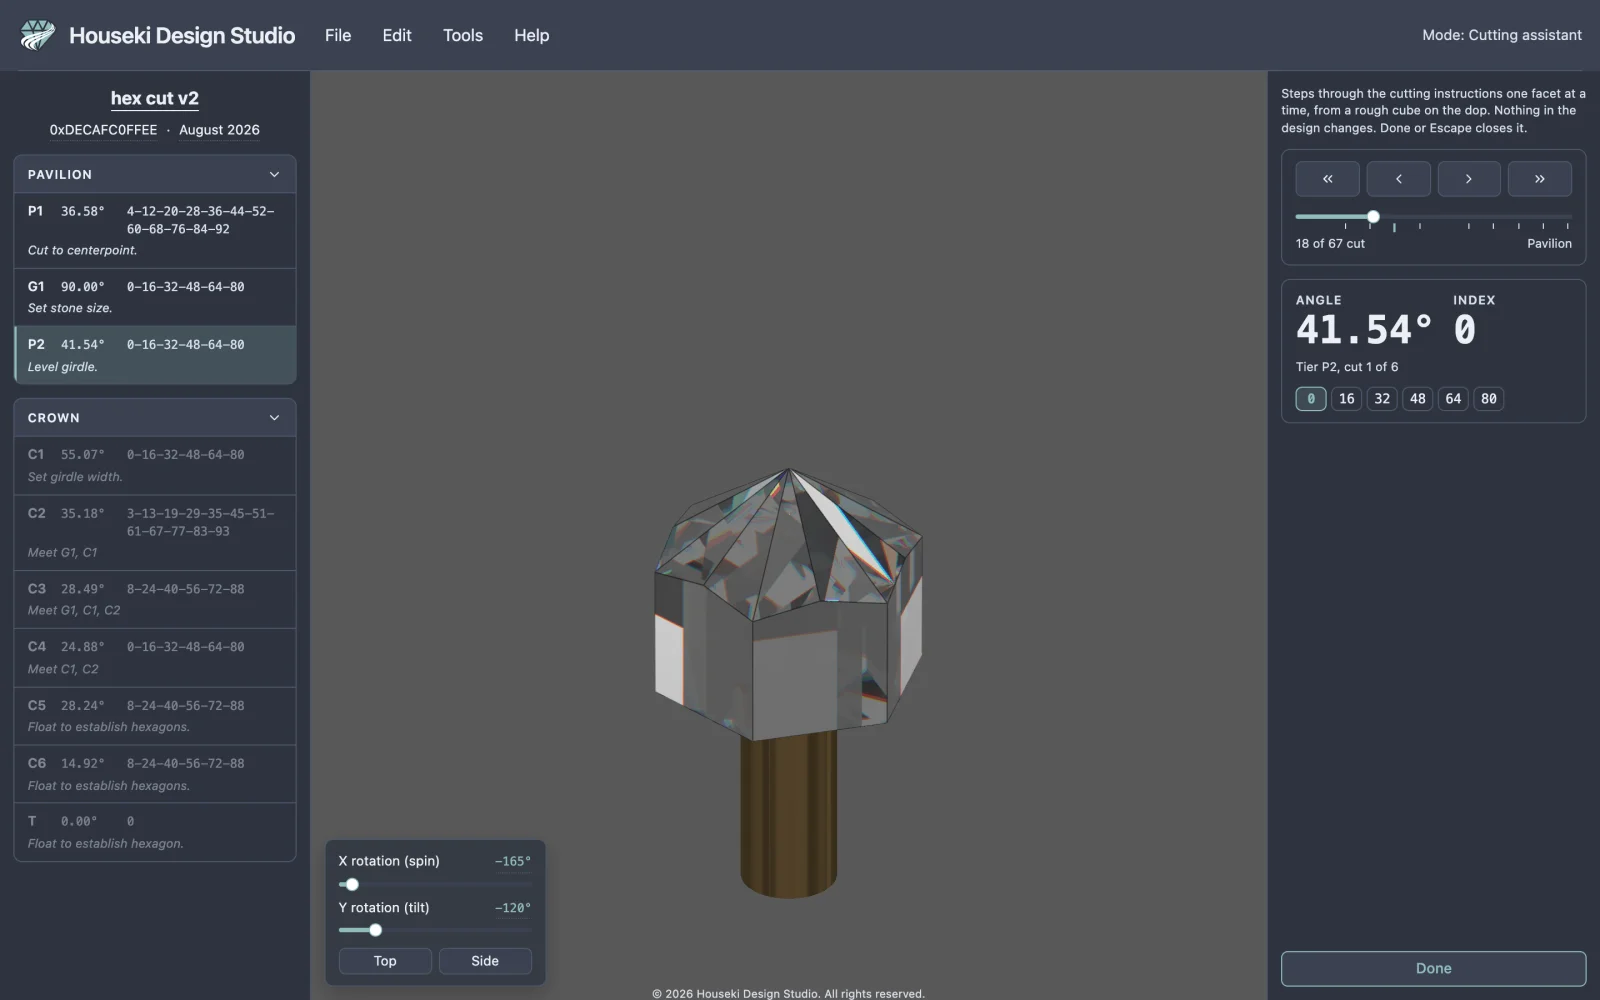
Once it opens, the top bar's mode readout, at the right-hand end, reads Cutting assistant — a reminder, from anywhere on the page, that you're in the walkthrough rather than looking at your finished design.

The render itself is replaced by a rough — a plain block, larger than the finished stone — sitting on a bronze rod, the dop. As you step through the cuts, facets appear on the rough one at a time, in the same order your cutting instructions list them, so the stone on screen always matches what you've cut so far and nothing more. The stone's own selection and corner statistics are switched off while this is open, since the shape on screen isn't the design's own stone; a click on it selects nothing.
On the left, the cutting instructions stay exactly as usual, except that:
- tiers not reached yet are faded out;
- the tier currently being cut is highlighted, the same way a selected tier is;
- clicking a tier's row jumps the walkthrough straight to that tier's first facet (its description editor does not open — the row's job here is navigation, not editing).
On the right, in place of the render settings, is the cutting assistant's own bar:
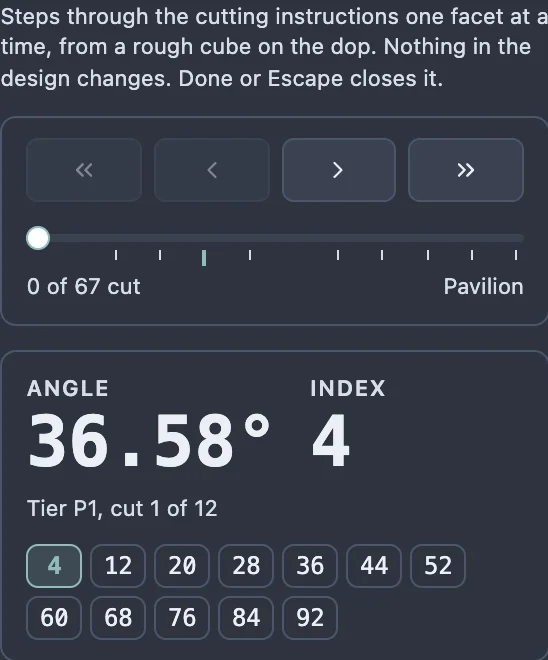
- Four step buttons, left to right: Previous tier, Previous cut, Next cut, Next tier (their icons are two chevrons left, one chevron left, one chevron right, and two chevrons right). Hover any of them for a tooltip explaining what it does.
- A slider under the buttons, with a tick for the start of every tier and a taller mark where the dop moves from the table to the culet.
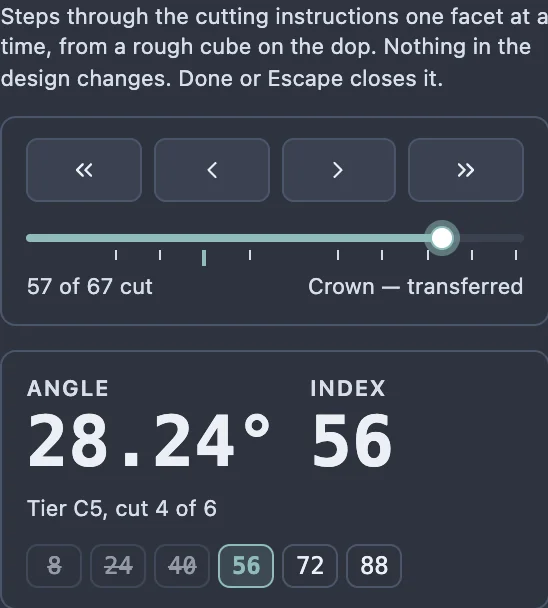
- Beneath the slider, how many cuts are made out of the total, and whether you're in the Pavilion or the Crown — transferred half of the design.
- In very large text, the Angle and Index of the next facet to cut — the two numbers you'd set on the machine.
- Below that, which tier you're in and how far through it ("Tier P2, cut 3 of 8", for example), then the tier's teeth: each one shown crossed out once it's cut, highlighted while it's the one being cut, and plain before its turn.
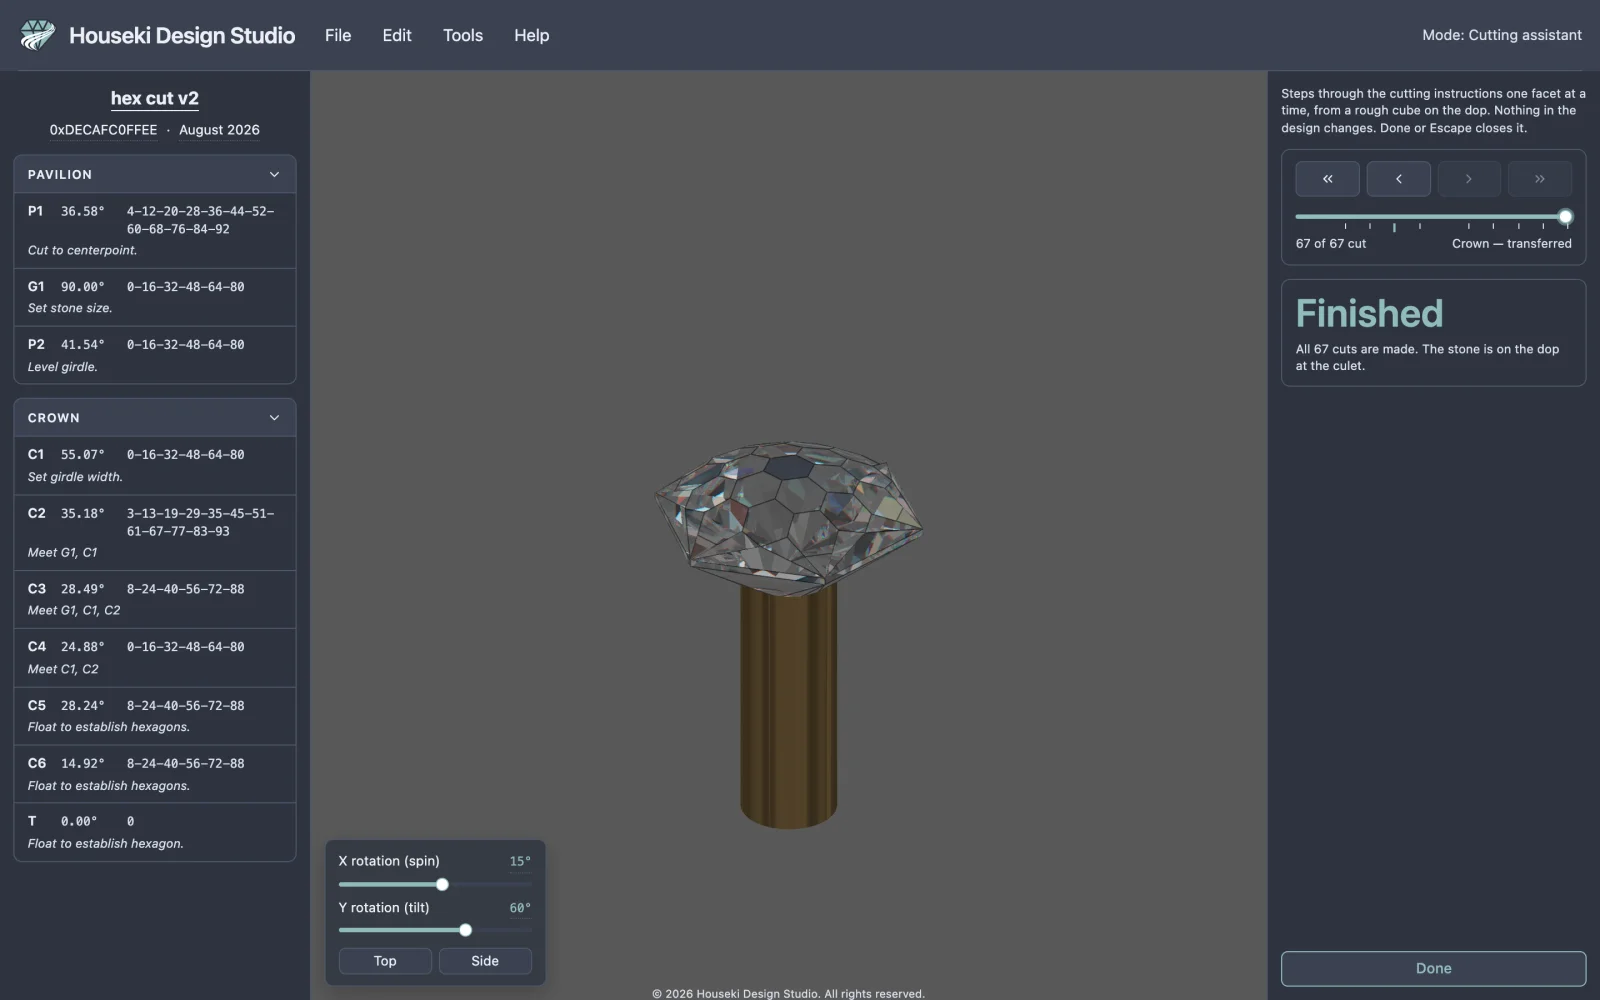
When every facet is cut, the big text reads Finished instead of an angle and index, and the stone on screen is the whole design, still shown on the dop at the culet.
Stepping through the cuts
Every way of moving through the sequence keeps the bar, the tier list and the stone in step with each other.
| Control | What it does |
|---|---|
| Previous tier | Back to the first facet of the tier you're in, once some of it is cut; press it again to go back a whole tier further, the way a media player's "previous" button restarts the track before it skips back. |
| Previous cut | Undoes the last facet cut into the rough, one at a time. |
| Next cut | Cuts the facet the bar is currently showing. After a tier's last facet, it moves straight on to the next tier's first. |
| Next tier | Cuts the rest of the current tier at once, so the next tier's first facet becomes current. |
The first two buttons fade out at the very start of the sequence, and the last two fade out once the stone is finished — clicking a faded button does nothing, but its tooltip still explains itself.
You can also:
- Drag the slider to scrub through the whole sequence in one motion. The rough is redrawn at low quality while you drag, and sharpens once you stop, so a long design doesn't stall the page while you're scrubbing.
- Click a tier's row in the cutting instructions on the left to jump straight to that tier's first facet.
Keyboard shortcuts
| Key | Does the same as |
|---|---|
| → | Next cut |
| ← | Previous cut |
| Shift+→ | Next tier |
| Shift+← | Previous tier |
| Escape | Done (see below) |
The arrow keys only step the cuts when the slider itself doesn't have the keyboard's focus — if you've just clicked the slider, its own left/right arrow keys move it by one cut instead, which comes to the same thing.
The renderer while it's open
The dop only shows up in the Deterministic and Flat renderers, not in Monte Carlo. So if the picker at the top of the Tracing section is set to Monte Carlo when you open the cutting assistant, it switches you to Deterministic for as long as the assistant is open; if you're already on Deterministic or Flat, it leaves your renderer alone. Either way, closing the assistant puts your own renderer choice back. This temporary switch is never saved as your default, so reloading the page in the middle of a walkthrough starts you back in Monte Carlo if that's your usual setting. See Deterministic renderer and Monte Carlo renderer.
Leaving
Click Done at the bottom of the bar, or press Escape — both do the same thing. Your design comes back exactly as it was; nothing the cutting assistant did is ever kept.
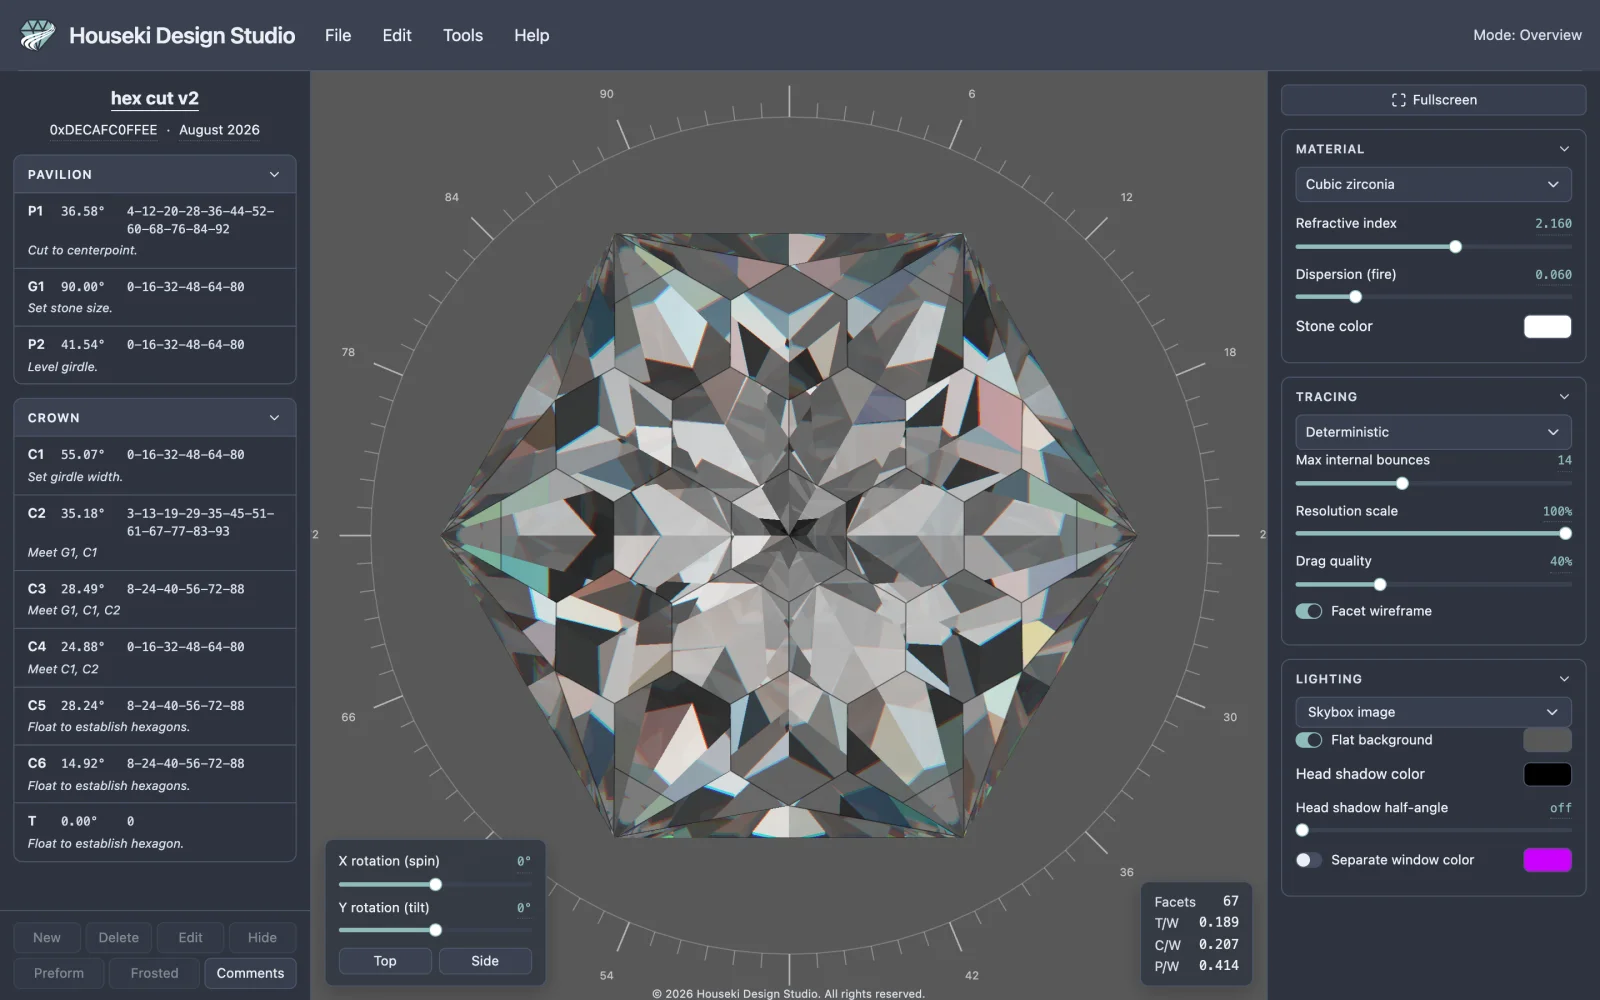
Undo and Redo are switched off while the cutting assistant is open, since there's nothing to step back through — none of the stepping above changes your design.
See also
- Editing facets by tier, for changing a tier's angle, index or depth — the cutting assistant only shows the sequence you've already set up there.
- Saving and exporting, for printing the same cutting instructions as a cutting sheet you can take to the machine instead of the screen.